
On this blog you have recently seen a post about the Ravello PowerShell module, and another one showing some Examples on how to use that module.
 I thought now would be a good time to show you one of my actual use cases. Discover how I deploy my main Lab in the Ravello cloud without a single click, and each time exactly the way I want it.
The Concept
Working in a (Home)Lab involves frequent re-installs, at least for me 🙄 . I do tend to break stuff while experimenting. Hence my wish to automate a major part of these re-installs.
A second prerequisite was that I wanted to have an easy way to define what went into such a Lab. The definitions should be in an easy to read format that I could place under source control, think GitHub.
The Ravello cloud is the ideal platform for a Lab, but it is missing the second requirement, a configuration file. To alleviate that problem, I started building a script based on my Ravello PowerShell module. And that script should be able to read the desired setup from a file, so I could construct the same Lab over and over, without any deviations. For the configuration file I decided to go for a JSON file. My primary reasons for choosing JSON; easily readable and less fluffy than an XML file.
The Configuration File
This file has all the information required to build the Lab. The first part contains information about the Lab itself.
[js]
"Lab": [
{
"LabName": "Yggdrasil",
"LabDescription": "vEng Test Environment",
"Force": "true"
}
],
[/js]
There is a name and a description, and also a Force switch. If there is already an Application by the name, the Force switch will tell the script that this previous instance can be removed.
The second part has information on all the ISO files, or Disk Images in Ravello speak, that are required for the Lab. An extract
[js]
"Iso": [
{
"Label": "W2K12R2",
"Filename": "en_windows_server_2012_r2_x64_dvd_2707946.iso",
"Path": "R:\\Homelab\\MSDN\\W2K12R2U1"
},
[/js]
This tells the script to upload the ISO file, if it is not already available in the Disk Image library. The name of the ISO file and the folder where it is stored are used by the Import-Ravello cmdlet. This Import-Ravello cmdlet is a wrapper around the Ravello Import CLI.
And lastly there is a number of VMs that need to be added to the Application.
[js]
"VM": [
{
"LabName": "Yggdrasil",
"VmName": "DC1",
"VmDescription": "Domain Controller",
"Image": "Empty",
"ISO": "W2K12R2",
"NumCpu": "",
"MemorySize": "",
"MemoryUnit": "",
"HD": [
{
"HDSize": "50",
"HDUnit": "GB"
}
],
"Hostname": "",
"RDP": "true",
"SSH": "false",
"Order": "1",
"OrderDelay": "300"
},
[/js]
These VM entries in the JSON file contain quite a bit of information. There is the Image (Empty in the example) from which the VM shall be created, the ISO to connect to the VM, any additional Hard Disks, the Supplied Services, RDP and/or SSH, that shall be added, and so on.
Now that we have an idea about the JSON configuration file, let’s move on to the code that will do the magic.
The Script
The script contains three major parts:
- uploading of the required ISO files
- create the Application in the Ravello cloud
- populate the Application with a number of VMs.
Upload ISO Files
The logic is rather straightforward. The script checks if there is already a Disk Image present with that name. If not, it will upload the ISO file to the Ravello Library as a Disk Image.
|
1 2 3 4 5 6 7 8 9 |
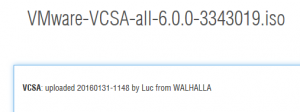
# Upload ISOs $lab.ISO | %{ if(!(Get-RavelloDiskImage -DiskImageName $_.Filename)) { Import-Ravello -IsoPath "$($_.Path,$_.Filename -join '\')" -Confirm:$false $doc = "**$($_.Label)**: uploaded $(Get-Date -Format 'yyyyMMdd-hhmm') by $($env:USERNAME) from $($env:COMPUTERNAME)" Get-RavelloDiskImage -DiskImageName $_.Filename | New-RavelloDiskImageDocumentation -Documentation $doc -Confirm:$false } } |
Note how the code uses the new Documentation feature that was recently added to several objects in the Ravello cloud. This allows you to link some additional info to the resulting Disk Images.
Create the Application – part 1
The next step will create the Application in the Ravello cloud. There is some additional logic, which avoids overwriting an Application, unless the Force switch is used.
|
1 2 3 4 5 6 7 8 9 10 11 12 13 14 15 16 17 18 19 20 21 22 23 24 25 26 27 28 |
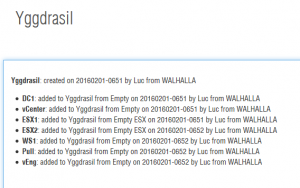
$lab.Lab | %{ $app = Get-RavelloApplication -ApplicationName $_.LabName # Remove previous instance when Force if($app -and [Convert]::ToBoolean($_.Force)) { Remove-RavelloApplication -ApplicationId $app.id -Confirm:$false $app = $null Write-Host 'Removed previous instance of application ' -NoNewline Write-Host -ForegroundColor Green "$($_.LabName)" } if(!$app) { Write-Host 'Creating Application ' -NoNewline Write-Host -ForegroundColor Green "$($_.LabName)" $order = @() $sApp = @{ ApplicationName = $_.LabName Description = $_.LabDescription Confirm = $false } $doc = "**$($_.Labname)**: created on $(Get-Date -Format 'yyyyMMdd-hhmm') by $($env:USERNAME) from $($env:COMPUTERNAME)`r" # Create Application and add Documentation $app = New-RavelloApplication @sApp $app | New-RavelloApplicationDocumentation -Documentation $doc -Confirm:$false | Out-Null |
Some points to note in this part of the script:
- The JSON file can contain the information to create multiple Labs in one run, hence the loop over all the elements in the Lab array
- JSON does not have a Boolean type, so we need to use the Convert function to convert the text string into a Boolean. Which we can then test in a conditional statement. See the interpretation of the Force switch
- Note that I have a strong preference for splatting the cmdlet parameters. This makes, imho, your code more readable.
- We attach Documentation to the Application
Adding VMs
This is the part of the script where most of the work is done. There are a number of distinct parts.
|
1 2 3 4 5 6 7 8 9 10 11 |
$sAddVm = @{ ApplicationId = $app.id ImageName = $_.Image NewVmName = $_.VmName NewVmDescription = $_.VmDescription Confirm = $false } $newLine = "- **$($_.VmName)**: added to $($app.name) from $($_.Image)" + " on $(Get-Date -Format 'yyyyMMdd-hhmm') by $($env:USERNAME) from $($env:COMPUTERNAME)" $doc = (Get-RavelloApplicationDocumentation -ApplicationId $app.id) + "`r$($newLine)" Add-RavelloApplicationVm @sAddVm | Set-RavelloApplicationDocumentation -Documentation $doc -Confirm:$false | Out-Null |
The VM, based on an Image that is available in the Ravello Library, is created. The script adds a line about the VM creation to the Documentation that is attached to the Application. When the script completes, and the Application is created, this will provide information on what and when.
Once the VM is created, some adjustments will be applied. This includes CPU and Memory requirements, but also an update of the hostname that is present on the Empty Esx Image.
|
1 2 3 4 5 6 7 8 9 10 11 12 13 14 15 16 17 18 19 20 21 22 23 |
# Adjust VM if($_.NumCpu -or $_.MemorySize -or $_.Hostname) { $sVM = @{ ApplicationId = $app.id VmName = $_.VmName Confirm = $false } if($_.NumCpu) { $sVM.Add('NumCpu',$_.NumCpu) } if($_.MemorySize) { $sVM.Add('MemorySize',$_.MemorySize) $sVM.Add('MemorySizeUnit',$_.MemoryUnit) } if($_.Hostname) { $sVM.Add('Hostnames',$_.Hostname) } Set-RavelloApplicationVm @sVM | Out-Null } |
This part of the script uses the new Set-RavelloApplicationVm parameters, that were introduced in v1.1.2.6 of the Ravello PowerShell module.
A quick side note here, the Ravello PowerShell module is available on the PowerShell Gallery. Make sure to use the latest version.

Continuing with the script, it will now check if additional Hard Disks for the VM are required. If yes, it will update the VM accordingly. The Set-RavelloApplicationVmDisk cmdlet was introduced in v1.1.3.0
|
1 2 3 4 5 6 7 8 9 10 11 12 13 14 |
# Additional HD on VM if($_.HD) { foreach($hd in $_.HD){ $sVM = @{ ApplicationId = $app.id VmName = $_.VmName Confirm = $false DiskSize = $hd.HDSize DiskSizeUnit = $hd.HDUnit } Set-RavelloApplicationVmDisk @sVM | Out-Null } } |
Next step will add/remove the selected Supplied Services RDP and SSH.
|
1 2 3 4 5 6 7 8 9 10 11 12 13 14 |
# Add/Remove Services if($_.RDP -or $_.SSH) { $sVM = @{ ApplicationId = $app.id VmName = $_.VmName Confirm = $false } if($_.RDP) {$sVM.Add('Rdp',[Convert]::ToBoolean($_.RDP))} if($_.SSH) {$sVM.Add('Ssh',[Convert]::ToBoolean($_.SSH))} Set-RavelloApplicationVmService @sVM | Out-Null } |
This part of the code is a bit tricky, since the cmdlet uses a Switch for both Supplied Services. The rule I coded, if the Switch is not present, no action will be taken.
If the Switch is present, it will check if the Supplied Service needs to be added ($True) or removed ($false).
This uses the Set-RavelloApplicationVmService cmdlet which was introduced in v1.1.3.0.
The final part for the VM creation is connecting the correct ISO file. Nothing special about this, it uses the Set-RavelloApplicationVmIso cmdlet.
|
1 2 3 4 5 6 7 8 9 10 11 |
# Connect the ISO $sIso = @{ ApplicationId = $app.id VmName = $_.VmName DiskImageName = &{ foreach($iso in $lab.ISO){ if($iso.Label -eq $_.ISO){$iso.FileName} }} Confirm = $false } Set-RavelloApplicationVmIso @sIso | Out-Null |
Create the Application – part 2
Once all the required VMs have been added to the Application, the script needs to “Publish” the Application. This is the location where you can specify if the Application should be Cost or Performance optimised.
|
1 2 3 4 5 |
# Publish the Application if(!(Test-RavelloApplicationPublished -ApplicationName $_.Labname)) { Publish-RavelloApplication -ApplicationName $_.Labname -OptimizationLevel PERFORMANCE_OPTIMIZED -Confirm:$false | Out-Null } |

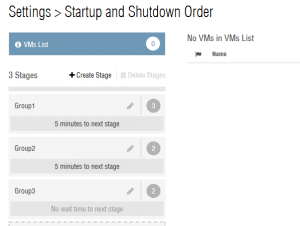
One last step, the script needs to define the Start Order of the VMs.
|
1 2 3 4 5 6 7 8 9 |
# Set the start order $order = $order | Group-Object -Property Group | Sort-Object -Property Name | %{ New-Object PSObject -Property @{ Name = "Group$($_.Group[0].Group)" DelaySeconds = $_.Group[0].Delay VM = $_.Group | Select-Object -ExpandProperty VM } } New-RavelloApplicationOrderGroup -ApplicationId $app.id -StartOrder $order | Out-Null |
This results in a Start Order for the VMs in the Application.
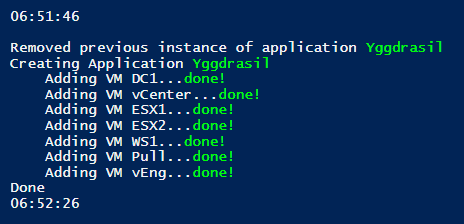
This completes the overview of the Lab creation script I have been creating last weekend.
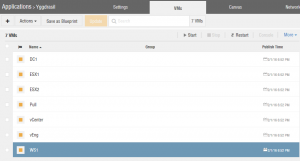
It creates my Lab, exactly as I want it, without any mouse clicks. And that in under 1 minute!
The PS1 script and a sample JSON file are available on my Scripts repository.
Please feel free to send questions, remarks, issues and suggestions.
Enjoy!